How to use Canva for Beginners!
“Design is the body language of your marketing. Don't slouch.” - Mark King
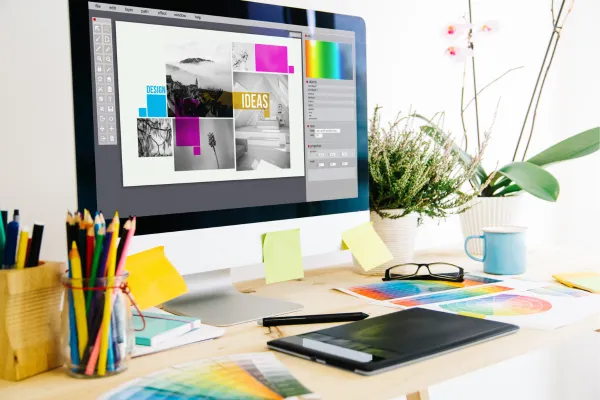
Hey, how’s it going today beautiful mama!
I am so excited for today’s post on How to use Canva for Beginners! as I’m talking about one of the most exciting tools I use on the daily…
I don’t know about you, but one of my biggest challenges in blogging is trying to design anything completely from scratch.
My mind goes blank and I can’t think how to start a design and if it weren’t for this tool and its templates, I’d probably still be sitting here now wondering how on earth I’d be able to create such amazing graphics and freebies…
I’ve mentioned it before in my how to start a successful mummy blog post and also within my freebie creation post!
It’s such an amazing tool to have in your toolkit and I really cannot recommend it enough…
It’s one of those tools that you’ll need an afternoon (I actually spent a whole day checking all the ins and outs of it out because I got so engrossed) because once you get into it, you’ll find it so hard to step away!
It has such a vast library, like no other I’ve seen before in an online tool.
So what is this totally amazing tool of awesomeness…
It’s called Canva and today we’re going to get into it and look at what it is, what it does and how to actually use it!
Because quite frankly, you won’t need any other design tool once you’ve checked it out…
When it comes to Canva, I don’t even know where to start, as it has so many cool things you can do with it (and that I want to talk about and show you).
It has a ton of features and design options and you’ll always be able to find something to help you create an incredible pin image, infographic, social media graphic and a whole lot more…
I use it a lot to create freebies and printables too!
It’s also incredibly versatile, easy and simple to use… you don’t have to be a technical graphic design whiz to use it!
This post will share 10 Steps on how you can use Canva to cover all your design needs 🙂
“This post does contain affiliate links throughout and if you make a purchase using one of my links, I receive a small commission at no extra cost to you”

What is Canva?
Before we get into the nitty gritty of what Canva can actually do, I should first tell you what Canva actually is…
Canva is a drag-and-drop, online design tool for creating any kind of design you can think of.
I’m talking videos, social media graphics, infographics, pin images, presentations, email headers… I mean if you can think of it, you can design it using this tool!
Before we start the step-by-step, I want us to look into Canvas features and also quickly share the different price plans available to you.
Canva’s Pricing Plans

Canva has a vast array of plans to suit everyone.
They offer the following plans:
Free
Pro
Enterprise
Education
Non-Profit
You can definitely use Canva completely free and I did myself for a while, because it still offers a lot of features for you.
As I started to use it more and more however, I decided to upgrade to the pro version, because it has a ton more customizations and templates available.

You can see in the image above, what the Pro plan offers…
I would suggest you start out with the Free version and see how you get on with it, as you may decide you don’t need to upgrade at all!
Use it for a while and get to grips with it and go from there…

Go ahead and sign up for an account and then once you’re logged in we can get started…
Now you’ve signed up and logged in, we can take a quick tour of Canva and see what it looks like…
Check out the video above, where I give you the first insight into Canva!
Canva’s Features

Canva has many different features available, from photo filters and hundreds of fonts to Icons and Shapes and millions of images, but they all fall under one of the 6 main feature elements below:
Design Types
Print
Videos
Apps
Graphs and Charts
Photo Editing
Let’s take a look at each of these individually now and find out more about them!
Canva Design Types
Here is where you’ll find all the design types available within the Canva design tool.

There’s literally so many to choose from.
You can design anything from social media graphics to full on presentations…
The design world really is your oyster…
Canva Print
The Print design options are insane and fab if you’re in the business of creating physical products, such as mugs, T-Shirts, Business Cards, Brochures and Wedding Invitations etc…

You can design your product within the Canva dashboard and then they’ll sustainably print and deliver them right to your door!
How awesome is that…
Canva Video
We all LOVE to watch videos and with Canva you can create your very own videos, without needing to be a professional video editor!
With all the templates right there for you, you can create videos in minutes, using the free music clips, free stock videos, animations and so much more.

Canva Apps
Canva has even gone as far as enabling you to integrate your fave apps into your designs!
If you want to add your latest Instagram photo, you can, if you want to add a Google Map, you can and if you want to embed one of your crazy YouTube videos – then there’s a way to do that too!

Canva Graphs and Charts
Who doesn’t love a graph and a chart!
I used to dislike them so much when I was at school, but I love an easy to read chart now, where info can get conveyed in a simple and visual way.
Canva has you covered in so many ways when it comes to the choice of graphs and charts held in its library.

Canva Photo Editing
So as well as the 60+million stock images Canva holds (if you’re using the Pro version that is) it also has many editing options, so that you can make your photos and images even more stunning!
Some of the options you can crack into are:
Filters
Effects
Adjustments, such as brightness, blur and contrast
Textures
Cropping
Flipping
Adding Speech Bubbles and Text
Transparency
Grids and Frames
Icons
Plus, there’s so much more to explore too!
So that’s all of the 6 main features covered and there’s just no way I could ever cover everything individually, because I’m still coming across new and exciting addons every day.
Canva are always adding new things as well, so make sure you sign up to their email list so you can get notified when they release a new edition to their platform!
So before we move on to actually using Canva, I wanted to share how they have a whole host of video tutorials which will help you with any aspect..
Just click on the “Learn” section on their website and you’ll get the help you need!

How to Use Canva for Beginners!
As you can probably tell from all I’ve said above, I’m slightly obsessed with Canva and have a total design crush on it!
I really could not live without this tool in my life.
Not only do I use it for all my blogging needs, I also use it to design things for my kids, create Desktop Wallpapers, of which I have a ton created (as I like to change them every few days to keep me motivated) and to generally browse when I’m looking for some much needed inspiration.
So with all that said, it’s time to see how to actually use Canva and I’ve broken it down into 10 simple steps.
Step 1 – Before designing anything, have an idea on what you actually want!
Before you jump into the designing phase in Canva, look at considering these things first:
Write down on paper an idea of what you want your design to look like
Maybe draw a quick outline, so you have some kind of visual (shape, elements, etc)
Think about what text you want on it and what you want to say
Where are you going to be using the design? (on your blog, social media platforms, within an email etc)
You don’t have to know all the details (or even all of the above). Just have some kind of vision as to what you want the design to be, as it will help you loads when you actually get down to designing.
After you’ve thought about the above, you can move onto step 2 and that’s deciding what you now want to design…
Step 2 – Choose a Template or set your Custom Dimensions
After deciding what you want to design, you now need to actually choose it and set it up…
You can choose from one of the hundreds of ready to use templates OR, you can select the custom dimensions option and enter in your own – so that you can create entirely from scratch!
There’s several ways to do this:
You can type what you’re looking for in the search bar and it will bring up a list of all the designs available for that search option

2. Another way is to check out the “Design Spotlight” options or simply click on one of the categories that are showing under this tab (Stories, Planners, Photo Books)…

3. The third option is to click on “Templates” where tons of design options are showing and you can click on one.

4. You can also simply click on the “create a design” tab in the top right hand corner and choose from the options there.

Note: If you decide to set custom dimensions, you have the option of working in pixels (which is what I always use and is the default dimensions) inches, millimetres or centimetres.

It depends entirely on what you’re creating.
So go ahead and pick something to design…
Once you’ve chosen a template/set custom dimensions, here is where you’ll see the Canva dashboard (where you’ll be working and designing) for the very first time!

I personally think it looks fairly simple at first glance, but it also actually IS simple and easy to use and navigate around.
I promise you that gorgeous mumma!
It will not take long for you to get to grips with it at all…
You’re now ready to start customizing your design!
Step 3 – Looking at all the options within the Canva library
Once you’ve clicked on the design you want to use, you’ll enter the design dashboard where you can start letting your creative juices flow, with what seems like an infinite library of goodies!
The infinite library consists of the following:
Canva Templates
The first option is the “Templates” where you can pick a template, which not only saves time, but also helps you if you haven’t got a great imagination or can’t think what to design completely from scratch (like me).

As well as the templates option, you have several other elements to choose from, to add awesomeness to your design.
Canva Uploads
This is where you can upload an image or video from your computer OR you can also upload from Facebook, Google Drive, Instagram or Dropbox (you’ll need to connect these accounts to your Canva for these)

Canva Photos
Here is where you have access to thousands upon thousands of photos, which you can use within all your designs.
Canva offers several different ways to find photos. You can sift through the “Trending” photos, you can click on one of the categories located at the top, or you can simply type in what you’re looking for and it will bring up all the photos available.
When you hover over the photos, it will tell you whether they’re free or pro, so you’ll know exactly what you’re getting.
All the photos are available within the Pro version.

Canva Elements
The elements tab offers soooooo many fantastic things to use within your designs.
I can’t even type them all down here as there’s so many.
Just to give you a glimpse into some of them, you have options such as:
Lines
Shapes
Stickers
Gradients
Zodiac Symbols
Sketchy Flowers
Girl Power
Bright Food…
And within those categories, there are tons of elements you can use.
It really is amazing…

Canva Text
The text options are so cool. You have the choice of adding a heading, sub-heading and body text.

You can also set up your brand fonts within the Brand Kit, although this is a Pro version option only). You also get some really fab font combinations too…
Have a proper play around with it, as you can create some crazily awesome designs!
Canva Styles
I love the styles options (which is a pro version only option, as far as I’m aware) as you get to test out some colour and font combinations, which Canva have already thought of for you.

Canva Music
This is one where you can simply choose audio and incorporate it into your design.
This is a really fun one to mess around with and background music is always a big hit when added to images and videos.

Canva Videos
Video is always extremely popular and Canva have taken this on board and included a lot of video clips you can use within your graphics.
They’ve also broken it down into categories, making it easier for you to find what you need.

Canva Backgrounds
The background section does not disappoint. There are so many options for you to choose from, from patterns and gradients to textures and flowers.
I can waste so much time checking out all the backgrounds (which we shouldn’t really do as there’s so much else we have to do in blogging) but it’s incredibly fun.

Canva Charts
I love the charts section on Canva and you can create all kinds of visual, statistical information using their awesome charts and graphs elements.

Canva Emojis
Who doesn’t love an emoji and Canva now has a whole host of emojis you can add right into your designs, making them modern and pop!

So they’re all the design types you can choose from, so I encourage you to spend some time having a go and creating some amazing designs as practice gets you more comfortable and confident.
As well as the actual design tools, there are also another couple of options within this library.
Folders
More
Canva Folders
Here you’ll find 6 folders where you can take several actions.

All your designs – here is where all the designs you create are kept, so you can come back to them if you need to tweak them or re-download them.
Likes – You have the option to “like” any photos or images you come across, so that if you find something that you think would be awesome to use at a later date, you can simply click on the “Add to Likes” and it will include it in this folder, so you don’t have to rummage through everything trying to find it when the times comes to pull it out the bag

3. Purchased – Here is where anything you purchase will be added. If you use the free account, you can purchase one off images and vectors etc. You can also decide what licence you want to purchase them under (one time use, multi-use or extended use).
4. Shared with you – Mainly used within the “Enterprise” plan, where team members need to share designs, here is where you can add the shared designs.
5. Logos – If you have set up the Brand Kit under the Pro version of Canva, you can add your Logo here.

6. Team Templates – Like the “Shared with you” folder, this one is the same in that you can share templates with team members.
So that’s the folder options gone over.
One other thing I wanted to mention about the folders, is that when you click on one, it gets added to the actual library menu on the left hand side.
If you want to remove it, you simply click on the little “x” in the top left hand corner.
More from Canva
Here is where all the Apps and Integrations are housed, that you can connect.
Simply click on any you want and connect it up to start using.

That’s it for a brief tour of all the elements within the library.
There’s a ton to look at and get to know, so don’t be scared to play around and utilise all it has to offer.
Building your design in Canva is all about layering different elements and we start this process with a background…
Step 4 – Choose a Canva Background for your design
The background for your design is the first element you want to look at.
Plain Colour Background
You can have a plain colour background, which can be any colour you can think of…
To do this, you can either click on the “New colour” and enter in a hex code for a colour you want to use, or you can type the colour in the search bar and lots of variations will come up, alongside colour combinations that go with the chosen colour.


You will also have your brand colours shown here if you’ve set a Brand kit within the pro version, along with all the default colours to pick from.

Let’s just say, you won’t be stuck on a colour choice!
If you can’t think of a colour palette or you want some colour inspiration, this Canva colour palette will really help you.
Background Templates
As well as just plain colours, you also have the other background options, which include tons of templates within each of the following sections.
I’m not going to show them because there’s just so many, but Canva really does spoil you for choice!
Landscapes
Patterns
Gradients
Abstract
Food
Textures
Flowers
Nature
Photo Backgrounds
Finally, you can also have a photo background and the best way to do this is to choose a “Grid” element which best suits the design you want to create and then you can add the photo in and adjust it within the grid.

There are sooo many different backgrounds you can choose from, to make your design look awesome, so have a play and see what looks great!
In the video below, you’ll also see all the different things you can do with the backgrounds, from the effects and filters, to cropping and flipping…
It’s much easier to show you these properly, than try and explain them in writing.
Step 5 – It’s time for some elements!
Next up you can start adding some elements into the mix!
The thing to remember is – keep it simple…
It’s very easy to get carried away and try to include all the elements available (because they’re so amazing) but you want to make sure that your design’s message is coming across loud and clear and isn’t being lost among too many pretty flowers and rainbows!
The elements section within the library holds a ton of different things to bring your designs to life…
Here’s a list of all the main elements:
Lines & Shapes
Graphics
Photos
Videos
Audio
Charts
Frames
Grids
Within these elements are even more elements.
It really is like the gift that keeps on giving…
I can guarantee you that whatever you need to add to your design, whether it be a unicorn or a dragon – you’ll find it within the elements part of the library!
And if you can’t find it through the elements themselves – just type whatever it is you’re after in the search bar and it’ll come up
There are also many elements and images you can use that are animated/GIFs and you can also choose to animate an element by clicking on the Animate button, where it brings up Element Animations options.

These animations are fab for making social media or blog image designs pop!
You can see in the video below how to use all the different elements within Canva.
Step 6 – Add in some Text
The fonts you use can make a big impact on how your designs look.
Also, the kind of fonts you use need to reflect the business or blog you have.
For example, you probably wouldn’t use a really bubbly font for your corporate business, yet a bubbly font would be ideal for a beauty blog or fashion brand.

Another little tip is to not use too many fonts in one design.
I would recommend two font styles at the most!
One script font maybe and one simpler one…
Look at what fonts compliment each other, as you don’t want to be slap dashing all kinds of fonts together and also ALWAYS make sure they’re readable.
Canva actually gives you font combinations in the text section, so you can see what will go well together.

Once you’ve chosen your fonts, it doesn’t end there.
You can:
Change the size of the text
Change the colour of the text
Choose whether you want it bold, Italic or underlined
Change the alignment of the font
Change it all to uppercase
Add in bullet points
Change the letter spacing
Add effects (this is really cool and a newish feature)
More – copying the text, adding a link and locking the element (this is so that you don’t accidentally change an element while you’re working on other elements within the design)
As with the elements within the library, you also have the option to “animate” your design, whenever any text is added…
Step 7 – What to do with your Design now it’s created!
Once you’ve created your fantastic design – what do you do next?
Canva offers several publishing options and we’ll get into those in a moment, but first, I wanted to talk about how your designs are saved…
Saving your designs
Canva automatically saves your work and any changes you make to it, however, you do have the option to save it manually and save to a folder.

This is great, as you never have to worry about whether you’ve saved anything and no work is lost.
Note: Also remember to “NAME” your design, which is done where it says “Untitled design” up in the top left.
Name it something which you’ll remember and will resonate with what the design is. The more designs you create, you’ll need to make sure you can differentiate between them all!

Download Publishing options
So now we’ll look at what the different publishing options are:
Download as PDF (standard or print)
Download as PNG
Download as JPG
Download as SVG (Pro version only)
Download as MP4 Video
Download as PDF Print
Download as GIF
Quick note: You can only download PNG images with a transparent background, if you’re using Canva Pro.
The free version of Canva does not offer this option.
Step 8 – Other awesome things you can do with Canva
So we’ve already talked about so many things you can do with Canva, but there’s still a few more things I want to show you, which will help you even more!
Additional Publish options
Within the Share tab (shown below) there’s some additional publishing options.

Here is where you’ll find all the options to share (including all the ones under the “download” tab) along with sharing links, the ability to present and record yourself and then share the presentation, sharing to social media platforms and online storage accounts and ALL the print options available for your designs.
It also gives you the option to save and share your designs to outside apps (HubSpot and Edgar etc)…

Other simple tips & things to use in Canva
Below I'm going to share other bits and bobs that Canva can do.
Make sure your text can be seen on your background
It’s really important to make sure that your text can be seen and stands out on your backgrounds.
Always make sure you use white or light coloured text on a dark background and black or dark text on a light background.

Place text in a shape over Images
If you have a lovely image and then you want to add some text over the image, the best way to make it stand out is to add a shape first and then add the text into the shape, as per the image below…

Adjusting Photos within a Frame
It’s really super simple to adjust photos that are within a frame.
All you have to do is double click on the image and move it to where you want it within the frame.

Using Grids whenever you add an Image
To make it easier for you to move and adjust your images around, always use Grids (of which there are tons of different layouts) where you can place your images inside and fit them accordingly.

Grouping + Ungrouping
If you use a template or the font combinations, most of the time, you’ll see they’re created grouped together.
If you want to make changes, the way to do this is to “ungroup” the elements, which then allows you to make any changes to the elements individually.
Click on font image and then on the three dots in the top right hand corner, which will bring up a menu. Here is where you’ll find the Ungroup option for you to select.

Positioning
Another great tool within Canva is the positioning tool.

You can position everything wherever you want it.
You can send things to the back, move them forwards, to the right, to the left and even horizontally and vertically.
Have a play around with it as you can make some really unique designs using this.
Transparency
I love the transparency option, which you can use on text, images, backgrounds and elements.
This can make your designs look really different and punchy!

Duplicate
If you click on anything within your design, you can select the “duplicate” button in the top right hand corner and it will make a copy of it.

Delete
Anything can be deleted too, either by clicking on the item and using the “delete” button on your keyboard, or you can click on the “delete” bin icon in the top right hand corner.

Zoom options
When you’re working on your design, you have several zoom options to choose from.
You can fit to screen, so you can see everything you’re working on in one go.
You can click on fill and it will fill the page, so you can see larger areas, or you can choose a specific percentage, ranging from 10% to 500%.

Grid View
If you click on the little square icon at the bottom right hand corner, it will open all the pages you’ve created in a grid view.
I’ve created 4 pages in the example below so that you can see how this works.

Present Full Screen
The little arrow symbols in the bottom right hand corner allows you to open up your design in full screen mode.
Just click the “escape” button or click on the little arrows in the bottom right hand corner again to escape full screen.

File
There’s an option in the top left hand corner named “file”.

You can name your design here (as well as in the top right hand corner that I showed before).
There are then 3 elements I want to mention here, which can help guide you when laying out elements within your designs.
These are particularly important to use when you’re creating designs which are to be professionally printed, or for when you want to line elements up more accurately.
Show rulers and Guides – if you click on show rulers, the show guides will automatically be ticked as well. This is where you can add in some guidelines, to help make elements more accurate in your design.
Show Margins – the margins are great to use on any print design, so that you can make sure nothing gets cut off. Keep everything within the margin lines and it’ll all be fine when it goes to print.
Show print bleed – this allows printing to be at the edge of the paper/card, leaving no white gaps. When the margin is added, it’s fixed and cannot be adjusted in anyway. If you do have white gaps showing, you can simply stretch the background to cover them and stretch any elements around the edges (elements which you don’t mind being cut).

So that’s some little extra tips and things I wanted to share with you, to help you create designs simpler and easier.
Step 9 – Canva Pro & all it has to offer!
Canva’s free version does so much and you can probably do everything you need with it (at least to start with anyway).
Canva’s free option (also known as Canva Basic too) means you can still design anything – you’ll just be limited to certain functionalities and the amount of things which are offered (pretty much the same as for any other free version of a tool).
If, however, you want to upgrade to Canva Pro at any point in time, I’m going to show you now what you get…
75 million premium stock images + photos, elements, music and videos (this has gone up, as it was 60 million +)
This is crazy to get your hand around, as there’s so many photos, elements, videos and audio files to choose from.

You’ll never, ever have to worry about not finding something to include within your design…
3000+ fonts + you can upload your own fonts
That’s a lot of fonts…
You’ll definitely be able to find a font within that amount 🙂
The great thing with Canva is, you’ll know what you do and don’t have access to if you’re using the free version, as it comes up with the little crown next to anything included under Pro.

As a Pro user, you’ll have the Upload a font at the bottom and when you click on it, it will allow you to upload your custom font…
Brand
The Brand tool is a really awesome add-on to the Pro version of Canva.

Brands make businesses and people always remember your brand!
When you are on your homepage, you’ll find it on the left hand side, within the menu.

Having a brand kit set up means you can have instant access to your:
Brand logos
Brand colours
Brand fonts

You can upload and add logos here, add colour palettes and also set a Heading, Subheading and Body font for your brand.
This makes designing so much quicker and more efficient, as you can simply click and add these in.

You can see from the image above that the brand fonts are set automatically within the text element of the library.
1TB cloud storage and unlimited folders
Canva Pro users get a whopping 1TB of cloud storage, plus you can create unlimited folders for all your designs.

This is a great way to keep all your resources and designs well organised.
You can also share folders with your teams and team members, import folders from apps such as Google Drive and Dropbox and upload folders from your computer.
You can also simply drag and drop designs into the folders you want to add them to.
Magic Resize
The magic resize element to Canva Pro is amazing!
I love using this all the time!

This is a phenomenal tool, especially if you need to create multiple images relating to one post or promotion etc…
Say you want to share a blog post on social media, Canva’s magic resize tool means you can create one design, such as an Instagram post and then click a button to create the same design in a Facebook post and Pinterest Image, or whatever it is you want to duplicate the same design for.
We all know that creating designs shouldn’t take a ton of time and with this magic resize button, you can make it even easier and quicker for yourself.

You can create an amazing design ONCE and then click resize and choose what new design you want to magically create from that design!
It really is super cool…
Transparent Background
Downloading your PNG designs with a transparent background is a MUST sometimes!
When you create things like logos, they usually need to be downloaded with a transparent background, so they can be placed on a number of things, such as business cards, letters, emails etc…

Certain designs may also require a collage of images, or you may need to layer images on top of each other or have a certain graphic which you need to use.
This is when transparency is key!
Background Remover
This is another fab Canva Pro feature…
You may find sometimes that you want to remove a background of one of the photos or images, or you may want to upload your own images and remove the backgrounds.

This comes in handy when you’re creating graphics and certain designs.
It’s really easy as you just click on the image you want to remove the background from and then click Edit image and select the BG Remover option.
It will then buffer for a while as it removes the background for you…
The screenshot below is the image in it's original state.

The screenshot below is showing you what you need to do in order to use the background remover tool within Canva.

The final screenshot below is showing the image once the background remover has done it's thing...

Instant Animations
Do you want to bring your designs to life in just one click?
Adding animations can make your designs lifelike and enjoyable for the people who see them.

You can use all kinds of animations to make your image pop, have it rise in from the bottom, pan in from the side or fade out etc…
You also have the option to animate elements separately or animate the page as a whole.
Making things fun and exciting will keep your audience interested and engaged!
24/7 Customer Support
Unfortunately, sometimes things go wrong.
With Canva Pro, you’ll always get support whenever you need it and they’ll get you back designing before you know it.
You can reach out to them by clicking on the question mark in the bottom right hand corner of the dashboard.

You can then type in what you need help with or select from one of the options available.
The final element of Canva Pro I want to talk about, is the Content Planner!
Content Planner
If you use social media as part of your blog or business, then you’ll know that scheduling is vital!

Rather than having an expensive and separate social media content calendar, you can use the inbuilt one in Canva Pro and create, schedule and publish directly from the dashboard…
To add a design to your Content Planner, follow these simple steps:
Click on Share and select Share on Social
Choose which platform you want to share your design to

Add in your title and caption and then you can publish it straight away from here if you wish (Publish now) OR
Click on the little calendar icon in the left hand corner which will open up the calendar, where you can choose a date and time to publish and click Done.

This tool will save you a heap of time, as you’ll no longer need to download each design and then upload to every single social media platform individually!
With the calendar view, you can see all your upcoming posts, so you can plan your content for the future!

This allows you to stay active and consistent with your social media audiences, without all the added effort…
Little tip for content creation: A great way to do this is to look at all the major events you have coming up, holidays, product launches etc…
You can then create designs for them and plan it all out inside your content planner!
So, there are the Canva Pro features…
There’s so many and they’re adding cool new things all the time.
Step 10 – Extra Tips and things you need to know…
You’d think after all the things I’ve talked about above, that would be it for Canva… but it isn’t…
There’s still a few more things I want to share with you, because Canva really does do so much…
Mobile App
We all tend to do so much on our mobile phones nowadays, because they’re convenient and on us all the time!
That’s why it’s great that Canva has it’s very own app, so you can work on your designs anytime, anywhere – awesome when you get a lightbulb moment right there and then!
Canva have made their app for iPhone and iPad and also Android mobile and tablet - so you’re covered with whatever you have.

You can do all the same things as with the online and desktop version, however, there are some additional features…
Because our smartphones have such great quality screens, there are more filters available within the mobile app, so check them out!
Desktop App for Windows
As well as the mobile app, you can also work on the Canva desktop version.

Just download it and you can do everything within the desktop app.
You just log in as normal and it all looks exactly the same.
Note: Canva still needs internet connection to work offline, as it runs through an electronic framework based application.
160+ Languages
Canva is now available in over 160+ languages.
The great thing is, when you use it in your selected language, it will bring up applicable fonts and possibly localized templates, if they’re available.
In order to change the language, you need to go to your Account Settings, select the language you want and click Save…

Canva Live
Canva also has the option for live presentations.

You can do it right from within Canva and there can even be live audience engagement.
It’s really simple and easy to use…

Making your presentations awesome and stand out won’t be hard as Canva offers transitions and magic shortcuts, so that your presentations are fun, unique and interactive.
Your audience can even join in and ask any questions from their own device.
Add Blog/Website URL to your designs
When creating your designs to put on your blog and social media platforms etc, make sure you always place your blog or website URL somewhere, so that people know it relates to you and your brand!

When you have amazing content and graphics, you want to show it off and get recognition for it, so making sure your logo or url (or both) are on these, will spread the word and people will start to associate your content with each other and get to know you!
Design School
Canva’s design school is really amazing and holds tutorials and courses for everything.
If you need to learn how to design graphics – there’s a course for that…
If you want to learn how to brand your business, there’s a course for that…

There are also tutorials for everything too.

I recommend watching the Getting started with Canva and Designing with Canva, to get you familiar with the way Canva works and to improve your designing skills.
Keep designs simple
One thing I want to emphasize is that you want to keep your designs clean, simple and not over-the-top!
Too many elements, text and photos can cause chaos for the mind and overwhelm your audience.
Avoid clutter and trying to fill every white space.
You can see how simple the templates are for the Instagram Posts within Canva…

Avoid too many colours
Most of the time, you’ll probably be using your brand colours throughout your designs, however, if not, try and only use two or three colours maximum.
Too many colours can also ruin a design!
A great tool within Canva for colour use, is that when you use a photo, it shows you the “photo colours” which is great for matching shapes and text for your design!

This can create some really simple, yet cool designs, without overusing colours and making the design messy!
Canva has a colour wheel tool which can help show you what colours go well together and compliment each other.

Some quick tips for colours are:
Use vibrant colours to enhance particular elements
Choose colours which compliment the images (as per the photo colour option mentioned above)
Use 4 colours or less
Don’t overload the text
Another tip is to limit the amount of text you have on your designs.
A great way to do this, is to switch out text for icons.
People tend to be more visual and information can definitely be portrayed with imagery, rather than pure text.
Visual perception is one of the quickest ways for people to absorb information.
In the example below, rather than using the words Instagram, Facebook and Pinterest etc, simply using the icons works and gives the design a cleaner and simpler effect.

So, we’ve come to the end of this post and I hope I’ve managed to get you to fall in love with Canva, just like I have…
I really couldn’t do without it and I use it more than any other tool in my blogging toolbox!
It’s good for soooo many things and I feel that if you only choose one graphic design tool, then Canva should be the one to have…
I hope you’ve enjoyed this how to use Canva for beginners post, but before it comes to an end, let’s recap as to why you should choose Canva (whether it be the free or Pro version) for all your design needs:
Thousands of awesome and amazing templates
Hundreds of thousands of stock images and photos
Super simple to use
No need for any graphic design skills
A huge range of fonts
Incredible elements to create any kind of design
Design School (all kinds of courses + tutorials)
Canva mobile app
Canva desktop app
Transparent backgrounds (pro)
Magic resize (pro)
Brand kit (pro)
Content Planner (pro)
Now it’s your turn to check it out and start creating some amazing designs…